Growing flowers from seeds is a rewarding experience that brings beauty and color to your garden. Not only is it cost-effective, but it also allows you to choose from a vast array of flower varieties that might not be available as potted plants. In this step-by-step guide, we’ll walk you through the process of growing flowers from seeds, ensuring you enjoy beautiful blooms in your garden.
Choosing the Right Seeds
Before you start your gardening journey, it’s essential to choose the right flower seeds. Here are some factors to consider:
- Climate: Research which flowers thrive in your local climate. Some flowers prefer warmer temperatures, while others flourish in cooler conditions.
- Soil Type: Certain flowers have specific soil requirements. Knowing your soil type will help you choose seeds that will thrive in your garden.
- Skill Level: If you’re a beginner, opt for easy-to-grow flowers like sunflowers, zinnias, or marigolds, which are forgiving and grow quickly.
Gathering Necessary Supplies
To get started, you’ll need a few essential supplies:
- Seed trays or pots
- Quality seed-starting soil or potting mix
- Plant labels (for organizing different flower types)
- Watering can or spray bottle
- Plastic wrap or humidity dome (to maintain moisture)
- Light source (sunny windowsill or grow lights)
Preparing the Soil
The success of your seeds largely depends on the quality of the soil. Here’s how to prepare it:
- Choose the Right Mix: Use a high-quality seed-starting mix that is light and well-draining. Avoid garden soil, as it may be too dense and contain pests.
- Moisten the Soil: Lightly moisten the soil mix before filling your trays. It should be damp but not soggy.
- Fill the Trays: Fill your seed trays or pots with the moistened soil, leaving about half an inch from the top.
- Level the Soil: Gently level the soil with your fingers or a small tool to create an even surface for planting.
Sowing the Seeds
Now it’s time to plant your seeds! Follow these steps:
- Check the Seed Packet: Each seed type has specific planting depth and spacing instructions. Check the packet for details.
- Make Indentations: Use your finger or a pencil to create small indentations in the soil, according to the recommended depth.
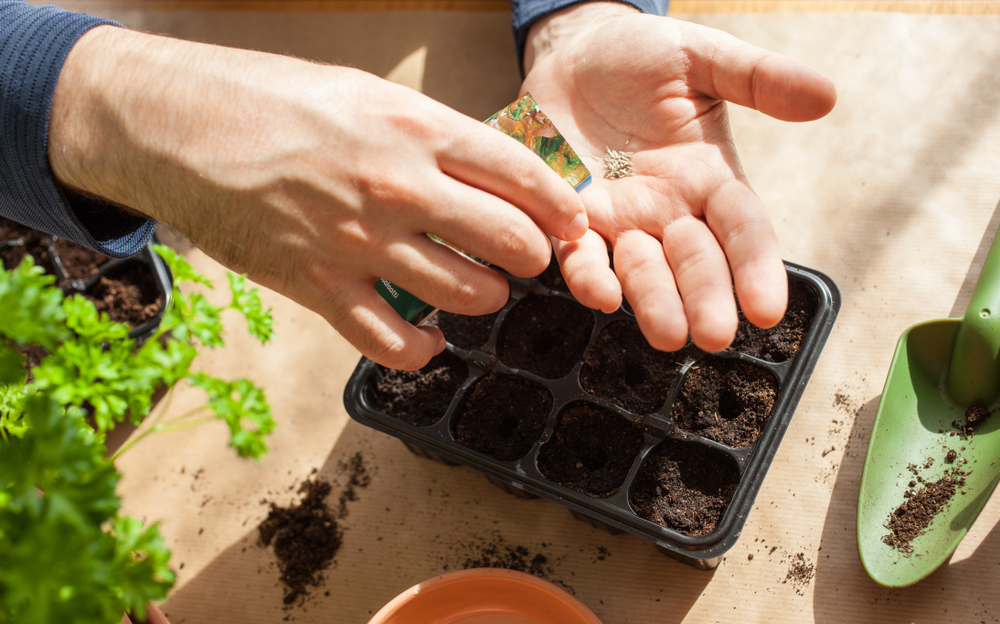
- Plant the Seeds: Place one or two seeds in each indentation. If you’re using smaller seeds, you can sprinkle them lightly over the soil.
- Cover the Seeds: Gently cover the seeds with a thin layer of soil, ensuring they are adequately covered but not buried too deep.
Watering and Care
Watering is crucial for seed germination. Here’s how to do it effectively:
- Initial Watering: After planting, use a spray bottle or watering can to moisten the soil gently. Avoid overwatering, as this can lead to seed rot.
- Maintain Moisture: Cover your trays with plastic wrap or a humidity dome to retain moisture until the seeds germinate. Remove the cover once you see sprouts.
- Light Requirements: Place your seed trays in a location with plenty of natural light or use grow lights to provide sufficient brightness for healthy growth.
Germination Process
During the germination phase, it’s essential to monitor your seeds:
- Timeframe: Germination times vary by flower type, usually ranging from a few days to a couple of weeks.
- Signs of Germination: Look for tiny sprouts emerging from the soil. Ensure the seedlings are receiving enough light and warmth during this stage.
- Healthy Seedlings: Healthy seedlings should be green and sturdy, with a pair of true leaves starting to form.
Transplanting Seedlings
Once your seedlings have developed a few true leaves and are about 2-3 inches tall, it’s time to transplant them:
- Harden Off: Gradually acclimate your seedlings to outdoor conditions by placing them outside for a few hours each day over a week.
- Prepare the Garden Bed: Ensure your garden bed is well-prepared with loose soil and good drainage.
- Transplanting: Dig a small hole in the garden bed, gently remove the seedlings from their trays, and place them in the hole. Fill in the soil around the roots and water lightly.
Ongoing Maintenance
As your flowers grow, keep them healthy with these maintenance tips:
- Watering: Continue to water your flowers regularly, especially during dry spells. Ensure the soil remains moist but not soggy.
- Fertilization: Use a balanced fertilizer every few weeks to promote healthy growth. Follow package instructions for application rates.
- Pest Control: Monitor for pests and diseases. Handpick any visible pests or use organic pest control methods to protect your flowers.
Common Challenges and Solutions
Growing flowers from seeds can come with its challenges. Here are some common issues and their solutions:
- Damping Off: This fungal disease affects seedlings. Ensure good air circulation and avoid overwatering to prevent it.
- Leggy Seedlings: If your seedlings are tall and spindly, they may not be getting enough light. Move them to a brighter location or adjust your grow lights.
- Pest Infestation: Keep an eye out for pests like aphids or spider mites. Use insecticidal soap or neem oil as a natural treatment.
Conclusion
Growing flowers from seeds is a fulfilling journey that can brighten your garden and enhance your outdoor space. With the right seeds, proper care, and a little patience, you’ll enjoy a vibrant display of blooms. So gather your supplies and get started on your flower-growing adventure!
For more gardening tips and resources, visit Gardening Daddy.

